Studio flash is all about positioning the light source away from the camera, so stands are crucial. They support the flash heads, which means they can be positioned at the right distance and angle to the subject. 
Image 1 of 7
3. Softbox
This is a huge diffuser that mounts directly onto the flash head. It’s sealed with internal reflective surfaces so that the light can only exit through the diffused panel at the front, which spreads and softens the light falling on the subject.
Image 1 of 7
4. Snoot and honeycomb
A snoot does the opposite of a softbox, concentrating and reducing the spread of light falling on a subject. It mounts onto the flash head like a reflector/spill kill, but has a very narrow opening for light to escape through, creating a spotlight effect. A honeycomb fits into a snoot or reflector/spill kill and narrows the light beam further.
Image 1 of 7
5. Reflector
Bounces diffused light back towards the shadow areas on a model. Use a plain white one to avoid color casts. Also consider one with a light absorber (black!) on the back, to help achieve a high-contrast look.
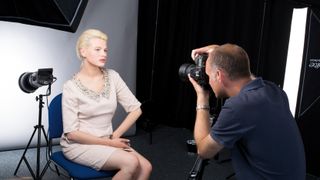
To control the quality and spread of the light, studio lights can be fitted with a variety of modifiers and accessories, such as the softbox and umbrella that you can see here. The modelling light – a constant bulb next to the flash bulb – will give you an idea of the effects of each modifier.
Image 1 of 6
4. Experiment with exposure
In manual mode, set the ISO to 100, the aperture to f/8 and the shutter speed to the fastest flash sync speed (usually 1/200 sec). Take a test shot. If it’s too light, either lower the flash power, increase the f-number or move the light further away. If it’s too dark, do the opposite.
Image 1 of 6
5. Strike a balance
With two lights, it’s all about the ratio between them. Turn on one light – we used a softbox from above – and expose for it. This is your Key. Now turn it off and turn on the other light – an umbrella from below, here. Aim for one or two stops of underexposure. This is your Fill.
Image 1 of 6
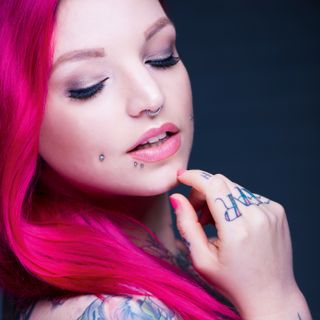
6. Blow the highlights
We can get a fresh high-key look with just two lights. Here one softbox lights the face, while an umbrella is angled at the background. The umbrella is fired at a higher power than the softbox, so it blows out the backdrop. A little reflected light creates a nice highlight along the cheek.