二重露光撮影 101
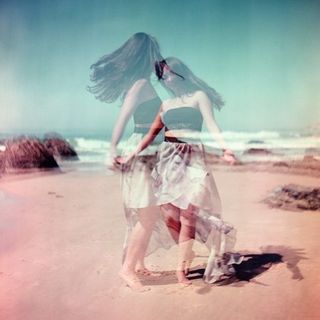
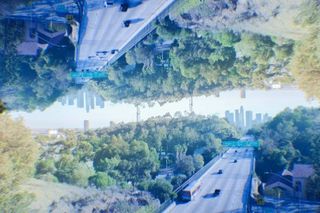
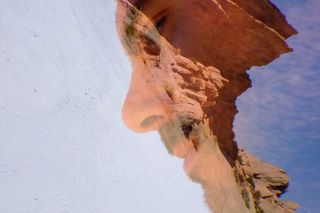
1 つのフレームに 2 つの露出を重ね合わせる方法は、最も一般的には二重露出と呼ばれ、写真の最大の楽しみの 1 つです。画像を重ね合わせるこのテクニックを使用すると、自然の画像を人のシルエットに形作ったり、さまざまな都市の風景を 1 つの画像につなぎ合わせたり、前衛的で夢のような写真 (この写真のような) を作成したりすることもできます。
これは間違いなく写真の最も創造的なテクニックの 1 つであり、写真家にユニークでよりインスピレーションを与える写真を制作する無限の可能性を与えます。これが、最近のデジタル カメラの多くが多重露出モードを提供し、撮影者 (あなたのような) が Photoshop に頼らずに二重露出を作成できるようにする理由です。
If you're one of the many photographers, novice or experienced, who haven't dabbled in the art of double exposure yet, you're in luck. Here's a short guide to shooting double exposures for beginners like you.
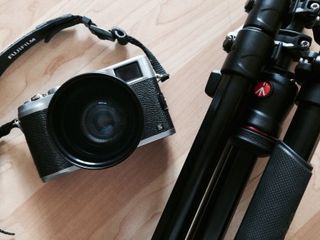
Make sure you have the right equipment
Not all DSLRs and mirrorless cameras have the multiple exposure mode. If your camera doesn't have that capability, don't let that stop you. It's worth shooting and experimenting with double exposures, so borrow the right camera from a friend, rent from your favorite store or, if you have some cash to spare, then by all means, buy one.
The Canon EOS 5D Mark III, Canon EOS-1D X, Canon 70D, several higher end Nikon DSLRs including Nikon D800 and Nikon D300, Fuji X-Pro1, Fuji X100s, Olympus OM-D E-M5 and some Pentax cameras, like the K10D, are among the many models that have multiple exposure capabilities. (For a full list of digital cameras with the multiple exposure feature, click here.)
Depending on what you're trying to achieve, a tripod, a shutter release cable, a flash and plain white or black background (it could be a muslin backdrop or that empty wall in your apartment) might come in handy, too!
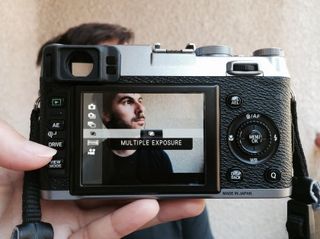
Know your camera's multiple exposure feature
While shooting double exposures is essentially just shooting two images in a single frame, different cameras handle this process differently. So, it's important to familiarize yourself with how your camera's multiple exposure function works. Read the manual and practice the process, if need be, before you go out and shoot.
Additionally, some cameras, like the Canon 5D Mark III, will allow you to take two or more exposures in one image as well as use a previously shot image, offering users more flexibility. Other cameras may have many limitations – the Fujifilm X100s, for example, will only let users shoot two frames in a row. If you're planning on renting or buying a camera to shoot multiple exposures, knowing how you're going to utilize this function is key.
Understanding and shooting double exposures
Now, before you start shooting, it's important to understand how double exposures actually work. In the days of film, taking multiple shots in a single image usually involved snapping one frame, rolling back the film and taking another snapshot to overlay the original. In today's digital age, we're still overlapping images, but instead of re-exposing film, it's simply a matter of blending data and pixels.
Technically, shooting double exposures with your digital camera is easy. Simply set your camera to Multiple Exposure mode, shoot your first layer (or select one from your camera's memory card, if permitted), then shoot your second layer, and you've got your double exposure. The hardest part comes when you're choosing, framing and positioning your two shots so that they blend well together into one image.
画像の最初の露出またはレイヤーは、2 番目のフレームの要素がブレンドされるベースレイヤーとして機能します。2 番目のレイヤーは基地と同じくらい重要であり、多くの点で撮影が最も難しいレイヤーになる可能性があります。もちろん、ランダムに被写体を選び、カメラを向けて撮影し、うまくいくことを期待することもできます。ただし、優れた被写体やシーンを選択し、カメラの角度を調整して、ベース レイヤに完璧にフィットし、ベース レイヤを補完する (または印象的なコントラストを提供する) と、より良い結果が得られます。
コンセプトから始める
誤解しないでください。自発的に二重露光画像を作成することは刺激的であり、驚くほど美しく想像力豊かな写真を生み出すことができます。ただし、初心者の場合は、ポートレートや 2 つの風景を重ねるなど、コンセプトに基づいて撮影することを選択すると、集中して基本を学びやすくなります。さらに、コンセプトがあると、いつどこで撮影するかを決めるのに役立ち、それによって二重露光がうまくいくかどうかが決まります。
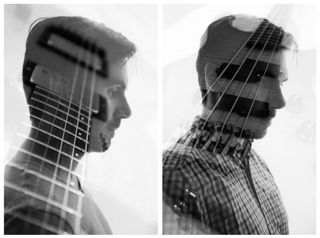
セルフポートレートに朝の通勤風景を重ね合わせるなど、日常の風景を撮影することは、最初の数枚の画像に最適です。しかし、恐れを知らずに感じているのであれば、ポートレートのシルエットにテクスチャを追加することは、二重露光の仕組みを理解するのに最適な方法です。
暗い対明るい
二重露光の撮影には実際のルールはありません。やりたいだけ実験的でクレイジーになってください。ただし、留意しなければならないことが 1 つあります。暗い被写体やシーンはより混ざりやすくなりますが、明るいまたは明るい被写体は二重露光で一部の細部が吹き飛ぶ可能性があります。
これが、混雑した都市のシーンやカラフルな落書きやストリート アートと同様に、シルエットが二重露光に最適な理由です。一方、晴れた空や明るすぎる風景をベース写真にすると、色あせた画像が生成される可能性があります。実際、多くの写真家は最初に暗いシーンを撮影し、次に明るいシーンを撮影することを好みます。

基本露出を慎重に選択してください
前述したように、二重露光の技術を習得した多くの写真家 (フィルムまたはデジタル) は、ベースまたは最初の露光として暗い被写体またはシーンを使用する傾向があります。しかし、これは経験則ではありません。実際、基本露出は、作成しようとしている画像によって異なります。
テクスチャーのあるポートレートシルエットを作成する場合、基本露出には白の背景が望ましいです。暗いシルエットによって 2 回目の露出の要素が隙間を埋め、白い背景が残りを洗い流して、驚くほど鮮明なポートレートが得られます。
コラージュを撮影する場合、明るく中間色が多いシーンよりも、賑やかでカラフルなシーンの方がベース画像として適しています。これにより、次のレイヤーのより強固な基盤が得られます。
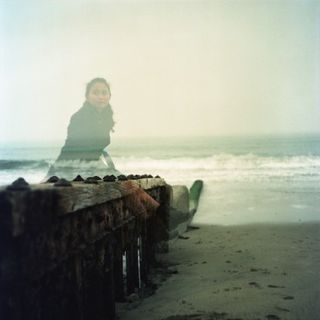
動きや幽霊のような二重露光の場合、両方のレイヤーに同じシーンを使用する可能性が高くなります。唯一の違いは、2 番目のレイヤーを撮影するときに、被写体をフレームの外に移動させるか、別の位置に移動させて、半透明でゴーストのような外観を実現することです。(このタイプの写真には三脚の使用をお勧めします)。
実験に行ってみよう!
二重露光の基本を学んだので、次のステップ、つまり現場に出て実験する準備が整いました。まず、7 つの素晴らしい二重露光のアイデアを紹介します。
- レンガの壁や石畳の通りなどのテクスチャ レイヤーを追加して、ダイナミックなポートレートを作成します (スライド 7 を参照)
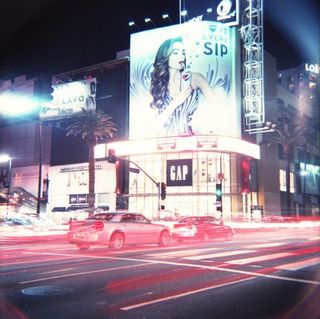
- ダンスや街の交通などの動きを伝えます (参照: スライド 1)
- インセプションにインスピレーションを得た独自の夢のシーケンスを作成します (スライド 5 を参照)
- 近所にある最も興味深いもののコラージュを作成する
- お気に入りの建築物をさまざまな角度から複数ショット撮影します
- 超現実的な物語を語ります (上記を参照)
- 超自然を捉えます (スライド 7 を参照)。
- 現在所有できる最高のデジタルカメラ
