
Retroarch は、Windows でさまざまなエミュレータを切り替える煩わしさを取り除く、オールインワンのエミュレーション フロントエンドです。Retroarch では、主要なエミュレータ ファイル (「コア」と呼ばれる) を直接ダウンロードできるため、ほとんどのゲーム コンソール エミュレータを 1 か所から開くことができます。
We’ll be showing you how to set up Retroarch, point you to the best cores, give you a little lesson on shaders, and replace the default UI with a snazzy new frontend (yes, we’re aware that that technically means you’ll be getting a new frontend for what’s already a frontend, but to that we say that you can never have enough frontend).
However, note that while emulators and frontends like Retroarch are legal, it is not legal to download roms or ISO image files for games that are still under copyright (i.e. most games). This varies by where you are in the world, but as a general rule you should only play roms of games that you already own, and which you’ve ripped from CD or cartridge yourself.
Basic setup
First up, download and install the latest version of Retroarch (opens in new tab). Because it’s such a vast, complex piece of open-source software, Retroarch can be a bit unstable.
Don’t be surprised if it crashes every now and then. If you think it’s crashing too often however, you can either try an older version of Retroarch by clicking the ‘Older versions’ link here (opens in new tab). Or you can go the other way and try out one of the latest nightly builds (opens in new tab).
With Retroarch installed, the first things you’ll want to do are install some cores (emulators, effectively), set up your controls, and load some content (or games).
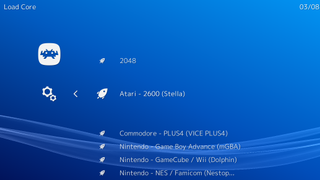
To download cores for your chosen platform - be it N64 or Commodore 64 - head over to the far left icon (Main Menu) in Retroarch, select Load Core > Download Core then select the ones you want.
For reference, here are the cores we think work best for each major platform, taking into account performance and accuracy (there are plenty of other platforms you can get cores for - these are just the biggies).
- NES: Nestopia
- SNES: Snes9X
- Sega Master System/Genesis/CD: Genesis Plus GX
- Game Boy Advance: mGBA
- Nintendo DS: Desume
- PS1: Beetle PSX HW
- N64: Mupen64 (performance), ParaLLEl (accuracy)
If you’re wondering where the cores for hit consoles like the Playstation 2 and GameCube are, the PS2 one is unavailable in Retroarch, while the GameCube one isn’t particularly stable. You’re better off finding standalone emulators for those consoles.
Retroarch control setup
If you have a gamepad set up with Windows (and you really should), Retroarch should detect it automatically. It tends to do a good job of mapping your gamepad’s controls up with specific cores too.

If you do want to change controls, you can. First, you should set up hot keys for Retroarch features like loading and saving states, fast-forwards, rewinds, and other flashy things.
Go to the cog icon (Settings), then select Input > Input Hotkey Binds to set up hotkey controls that suit you. These will apply universally, no matter what core you’re playing on.
To change controls for a specific core/console, load that core by going to the Main Menu icon > Load Core and selecting the core.

With the core loaded, select Quick Menu (above the Load Core option). Go down to Controls, make whatever changes you want, then go up and select either ‘Save Core Remap File’ or ‘Save Game Remap File’, depending on whether you want controls to apply across the whole core or just that game.
Loading games into Retroarch
The next step is to load your games into Retroarch as ‘Collections’, which means Retroarch will organise them by the console they run on.
Go to the Main Menu icon, select Load Content -> Collections -> Scan Directory then navigate to the directory where you keep your games. When you reach it, select ‘Scan this directory’, and Retroarch will add everything it finds to the homescreen.

ゲームを追加したら、Retroarch メイン メニューに戻ると、コンテンツをロードした各コンソールを表すエレガントな小さなアイコンが表示されます。
以下でわかるように、私たちは Atari 2600 で ET を選択しました。このゲームは、「史上最悪のゲーム」という称号にふさわしいものであることが確認できました。

ゲームをプレイするには、このリストからゲームを選択し、ダウンロードしたコアの 1 つを選択してロードします。
グラフィック、プラグイン、その他の調整
各コアには独自のグラフィック設定セットがあり、好みのゲームの見た目や PC の能力に応じて調整したり、調整したりする必要があります。
Retroarch のユニバーサル設定 (Retroarch ホーム画面の [設定] アイコンの下にあります) と、クイック メニューで変更するコア固有の設定を区別することが重要です。
クイック メニューで行った変更のみが、コアまたはゲーム オーバーライドとして保存できます。[設定] メニューで行った変更は、コア間で手動で変更する必要があります (変更する必要がある場合)。

コアを選択する前に変更する必要がある最も重要な設定はビデオ ドライバーです ([設定] > [ビデオ ドライバー])。特定のコアが起動時にクラッシュする場合は、openGL (gl) ドライバーと Vulkan ドライバーを切り替えて、それが解決するかどうかを確認することを検討する必要があります。
Vulkan は 2 つの API のうち、より新しく高度な API であり、Beetle PSX HW などの強力なコアと併用すると真価を発揮しますが、Mupen64 などの他のコアは GL ドライバーに依存します。
一方、ParaLLEl N64 コアは Vulkan を使用できますが、まず「gl」ドライバーを使用してゲームを開き、GFX プラグインと RSP プラグイン ([クイック メニュー] > [オプション] の下) をそれぞれ「angrylion」と「cxd4」に変更する必要があります。次にドライバーを Vulkan に変更し、Retroarch を再起動します。

ピクセル時代のゲームをプレイしている場合、最も重要な切り替えの 1 つはバイリニア フィルタリング ([設定] > [ビデオ] > [バイリニア フィルタリング]) です。スイッチをオフにすると、ゲームにハードなピクセルの外観を与えるか、またはソフトでぼやけた外観を与えるかが切り替わります。それはオンです。私たちはピクセル化されたゲームが元の鮮明さを維持することを好むため、オフのままにすることを好みます。
さらに、クイック メニューのコア オプション (コアをロードし、[クイック メニュー] -> [オプション]) で、個々のコアごとに独自の変更セットを行うことができます。
たとえば、Beetle PSX HW を使用すると、内部解像度をオリジナルの PS1 の何倍にも上げたり、ワイドスクリーン ハックを追加したり、PGXP パースペクティブ修正テクスチャリングを使用して、3D モデルが画面上を移動するときに生じる PS1 の歪みやぐらつきを取り除くことができます。

N64 コアでは、拡張パックや 64DD (覚えている人はいますか?) などの追加のハードウェアを仮想化できます。
変数はたくさんあります。すべてを Super HD にしたい場合でも、元のハードウェアにできるだけ忠実に保ちたい場合でも、設定をいじって自分に最適な設定を見つけるのは価値があります。
シェーダ
シェーダーは、ゲームの上部にあるフィルタリングのレイヤーであり、CRT スキャンライン (みすぼらしい本物の雰囲気を演出する)、アンチエイリアスによる滑らかなエッジ、プレイエリアの周囲の境界線など、あらゆる種類のエフェクトを追加できます。

コアをロードすると、[クイック メニュー] > [シェーダ] > [シェーダ プリセットのロード] の下にシェーダが表示されます。シェーダには 3 つの異なるファイル形式があります。
これらには概して同じシェーダーのコレクションが含まれていますが、どのシェーダーを使用するかは、特定のコアに使用するビデオ ドライバー (Vulkan、GL など) によって異なります。3 つのシェーダ形式は次のとおりです。
cg -幅広い互換性がありますが、非推奨となり、他の 2 つの形式ほど強力ではありませんが、古い PC に適しています。
glsl - GL ドライバー用に設計
Slang - Vulkan ドライバー向けに設計
この例では、Load Shaders Presets > shaders_slang > border > sgba にある Game Boy Advance のボーダーを ET に与えました (任天堂から、コンソールと ET の関連付けを解除するよう求めるしっかりとした文面の手紙が今すぐ届くことを期待しています…)。

シェーダを設定したら、[Shaders] > [Shader Parameters] で調整し、[Save Shader Preset As] を使用して独自のシェーダとして保存できます。
新しいフロントエンド
Retroarch の PS3 スタイルの XMB インターフェイスは悪くありませんが、決して派手ではありません。ゲームのボックス アートやその他の画像はサポートされていないため、少し不毛に感じる可能性があります。
ありがたいことに、Retroarch で使用できる優れたフロントエンドがあり、私たちのお気に入りは Launchbox (Steam ゲームもサポートしています) です。Retroarch ライブラリを Launchbox にリンクする方法は次のとおりです。
まず、Launchbox をダウンロードします(新しいタブで開きます) (電子メール アドレスを入力し、受信トレイに送信されたリンクを使用する必要があります)。
インストールしたら、Launchbox を開き、[ツール] > [エミュレータの管理] > [追加] に移動します。[エミュレータ名] ボックスで、ドロップダウン メニューから [Retroarch] を選択し、[エミュレータ アプリケーション パス] ボックスで Retroarch.exe のディレクトリを指定します。「OK」をクリックします。

Retroarch が「エミュレータの管理」ボックスに表示されるはずです。それを選択し、[編集] > [関連プラットフォーム] をクリックすると、ダウンロードしたすべての Retroarch コアが「コア ファイルが見つかりません」ステータスなしで表示されます。
プラットフォームの希望するコアがリストにない場合は、プラットフォーム名の横にあるコアのリストをダブルクリックし、ドロップダウン メニューから希望のコアを選択します。完了したら、「OK」をクリックします。

最後のステップは、ゲーム (または ROM ファイル) を Launchbox にインポートすることです。[ツール] -> [インポート] -> [ROM ファイル] に移動し、ウィザードに従って必要な rom ファイルを追加します。
プロフェッショナルな外観を実現するには、ゲームのメタデータと画像をダウンロードすることをお勧めします。オプションが与えられたときにすべての画像をダウンロードしませんでしたが、ボックス アートは必須であり、「ファン アート - 背景」とは、ライブラリでゲームをハイライトすると、その背後に素敵な大きな背景画像が表示されることを意味します。

以上です。これで、ゲームが Launchbox ライブラリに追加され、ボックス アートとダウンロードした追加のイメージがきちんと表示されます。
最後に行うべきことは、Launchbox をゲームパッドで動作するように設定することです。[ツール] > [オプション] に移動し、ナビゲーション ペインで [入力] > [ゲームパッド/ジョイスティック] を選択し、[ゲームパッド/ジョイスティック入力を有効にする] ボックスにチェックを入れるだけです。