Apple iPhone は、デフォルトのカメラ アプリが多すぎる機能で乱雑になることにおおむね抵抗してきましたが、昨年、写真スタイルと呼ばれる一連のプリセットが登場したことで状況が一変しました。
これらは、多くの包括的なカメラの改良点の 1 つとしてiPhone 13シリーズに初めて搭載されましたが、現在はより手頃な価格のiPhone SE (2022)にも搭載されています。つまり、写真スタイルはこれまで以上にアクセスしやすくなりましたが、使用すべきでしょうか? もしそうなら、Apple の最新のカメラ機能を最大限に活用するにはどうすればよいでしょうか?
これらの質問などに答えるために、この便利なガイドをまとめました。スタイルは iPhone のネイティブ カメラ アプリの標準の写真モードにあり、4 つの異なるプリセットから選択でき、それぞれは個人の好みに応じてさらにカスタマイズ可能です。
従来のフィルターとは異なり、キャプチャーの時点でフィルターを使用できます。つまり、必要のないときにフィルターをオフにすることを忘れない限り、写真を撮るたびにフィルターを使用できます。デフォルトでは、カメラは自動的に標準に設定されており、Apple によれば、これにより「実物に近い」外観が得られるという。
他の 4 つのスタイルは、より強化または様式化された外観を与え、Instagram や Lightroom などの他のアプリやソフトウェアで見られる一般的なフィルターを使用するのと似ていますが、同じではありません。ここでは、写真スタイルについて知っておくべきことすべてと、写真スタイルを使用してスナップにインパクトを与える方法についてのヒントをいくつか紹介します。
写真スタイルを備えている iPhone はどれですか?
スタイルは、2021 年に初めて導入された iPhone 13 シリーズで利用できます。つまり、iPhone 13、iPhone 13 Pro、iPhone 13 Pro Max、iPhone 13 Mini で見つかります。
新しい iPhone SE (2022) でも利用できるようになりました。これはこれまでで最小かつ最も安価な iPhone であるため、写真スタイルは予算が豊富なユーザーだけが利用できるものではなく、まったく新しいユーザーが利用できるようになったことを意味します。
これまでのところ、写真スタイルはファームウェアのアップグレードを通じて iPhone 12 Pro などの古い iPhone モデルに追加されていません。不可能ではありませんが、Apple はこの機能を旧モデルと新モデルの違いとして残しておく可能性があります。
Naturally, we can expect that any new iPhone models, like the rumored iPhone 14, are likely to include Photographic Styles going forward, too.
Photographic Styles vs filters: what’s the difference?
Given that Photographic Styles seem a lot like filters, is there any benefit in using them over something you might otherwise find in apps such as Instagram or Lightroom?
Yes, in some situations. The important difference is that these styles are added at the point of capture, rather than retroactively, and also tap into Apple's computational processing. This means your iPhone is capable of applying Styles intelligently for the best possible results. For example, a Style won’t necessarily be applied to all parts of the image if could make a skin tone look strange.
By contrast, digital filters are usually applied unilaterally and can require more work to make them look natural. Applying a filter at the point of capture can also save you time, compared to spending time editing your shots.
You can also customize Styles to enhance or change them, depending on your own personal preferences or how well they might work with a given subject. We have a lot more detail on this further down in our 'how to master Photographic Styles' section.
That said, despite their smarts, Photographic Styles are relatively modest compared to many filters, in terms of their variety and impact. They give a reasonably subtle effect when compared to the default 'Standard' option, which may or may not be what you're after. Apple describes its four options as follows:
- Rich Contrast: Darker shadows, richer colors, and a stronger contrast create a dynamic look.
- Vibrant: Wonderfully bright and vivid colours create a brilliant yet natural look.
- Warm: Golden undertones create a warmer look.
- Cool: Blue undertones create a cooler look.
How to use Photographic Styles
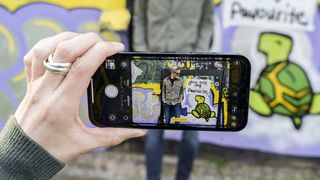
Photographic Styles are simple to use. You’ll find them in the native camera app, either by swiping up from the main window, or giving the small arrow at the top of the screen a quick tap.
Tap the icon marked with three squares and you’ll then have the option to swipe between the different Styles available – starting with the Standard default option, moving through to Rich Contrast, Vibrant, Warm and Cool.
It’s important to note that you can’t use Photographic Styles when shooting in Apple’s ProRAW format, so that must be switched off. You will be able to record Live Photos using Styles though, so that can be on or off depending on your preferred way of shooting.
You’re now free to use the Styles on your subject – here are some tips to help get you started with them.
1. Do some early experimentation
Before you start applying them to all your photos, it pays to spend a little time getting to know the different Styles to see how each looks. After all, photography is subjective and you might want to make tweaks to Apple's defaults or use them in unusual ways.
The easiest way to experiment is simply to swipe between them, taking pictures and noting the differences. Remember that different subjects might see the Styles applied slightly differently, so it’s worth trying a variety of different subjects.
Taking images with each of the Styles applied gives you scope to choose your favorite later, and build some muscle memory for applying the ones you prefer in particular situations.
2. Make adjustments to get a customized look
If you like the Styles, but want more control over how your finished image looks, you can make adjustments to better suit your tastes. As you swipe through the different Styles, you’ll see underneath the Style’s name are sliders for adjusting Tone and Warmth.
As soon as you touch these sliders, you’ll be creating a custom preset, that will stay adjusted until you either change it again or reset the filter. It’s worth moving these sliders up and down to see how they affect your image, with the preview being displayed in the composition window as you do it.
You might notice that the name of an individual Style changes as you adjust these sliders – for example, add in some Warmth to Vibrant and it’ll now be called “Vibrant Warm” instead.
3. Try Styles for portraits (but not in Portrait mode)
One of the best applications for Photographic Styles is portraits. As we mentioned, your iPhone will apply these intelligently and should keep Skin Tones looking natural, while boosting other aspects of the scene, such as the background or the clothes that your subject is wearing.
その良い例がリッチ コントラストです。これはポートレートに素敵なパンチを加え、微妙ですが顕著な効果を与え、写真を良い状態から素晴らしい状態に引き上げます。色調スライダーと暖かさスライダーの両方を押して、ポートレートにさらに大胆な変化を加えてみてください。
これらの変更は、どちらかの極端な方向から行うのではなく、小さな段階的に段階的に加え、あちこちに +5 または -5 を追加して画像にどのような影響を与えるかを確認する価値があります。ただし、重要な注意点が 1 つあります。残念ながら、現在、写真スタイルは専用のポートレート モードでは使用できません。
4. 適切な被写体に最適なスタイルを見つける
おそらくすぐに、さまざまなスタイルがさまざまな主題に適していることがわかるでしょう。それは実験によって学び、おそらく個人的な好みにもなるでしょう。
「リッチ コントラスト」は風景に適しており、「鮮やか」は花などの一般的に明るい被写体に適しており、「暖色」は夕日や日の出に適しており、「クール」は都市風景や低光量の撮影に最適であることがわかりました。
そうは言っても、結果を試すにはうまくいかないと思われるスタイルを使用してみてください。たとえば、「クール」を使用すると、典型的な風景に珍しい外観を与えることができます。
特定のスタイルや調整をやりすぎないよう注意する必要があります。たとえば、暖かさを追加しすぎると、過度に鮮やかで不自然に見える傾向があり、そのため、ほとんどの状況で魅力が薄れます。
5. 忘れずにリセットして削除してください
スタイルは一度キャプチャすると削除できないため、使用したくないときは忘れずにスタイルをオフにすることが重要です。そうしないと、カメラ ロールがおそらくあなたが撮影したことのない「クールな」ショットでいっぱいになってしまいます。そのつもりはない。
使用を停止するには、いつでもカメラ画面の上部にある 3 つの四角形のアイコンをタップし、スワイプして「標準」に戻ります。
また、特に大幅な変更を加えた場合には、トーン スライダーと暖かさスライダーを使用して行った調整をリセットすることも価値があります。リセット アイコンをタップすると、すぐにデフォルト設定に戻ることができます。